How to Maintain Color Uniformity in Fence and Deck Stains
If you’ve ever finished a fence or deck only to notice darker boards, lap marks, or patchy patches the next day, you’re not alone. Achieving a uniform stain color on outdoor wood can be tricky—but it’s absolutely doable with the right prep, products, and techniques. In this guide, you’ll learn proven color consistency tips, smart stain blending strategies, and application methods that deliver an even finish across fences and decks.
Whether you’re working with fresh lumber, weathered cedar, or pressure-treated pine, the steps below will help you plan your project, prevent surprises, and correct issues quickly so your results look beautifully consistent from post to plank.
What Really Affects Color Uniformity
Wood Species, Age, and Previous Exposure
Different species absorb stain differently. Cedar, redwood, and pine have distinct densities and grain structures that influence how much pigment they take in. New, tight-grained boards tend to absorb less, appearing lighter, while older or more open-grained boards soak in more, appearing darker. If your fence or deck includes a mix of new replacements and older boards, expect variation unless you plan for controlled absorption and thoughtful stain blending.
Previous exposure matters too. Sunlight and rain break down lignin and raise the grain, which can lead to uneven absorption. Clean and brighten weathered wood before staining to level the playing field and promote an even finish.
Moisture Content and Weather Conditions
Moisture acts like a blocker. If boards are damp, water crowds the wood cells and reduces stain penetration, creating lighter patches. Use a moisture meter and aim for the manufacturer’s recommended range (often below 15% for oil-based; check your product). Temperature, sun, and wind also influence uniformity—direct sun accelerates drying and will cause lap marks. Work in the shade, avoid hot boards, and keep a wet edge to maintain color consistency.
Stain Type and Pigment Load
Semi-transparent stains accentuate grain and are more sensitive to substrate variation; solid-color stains mask differences but still require consistent application to avoid flashing. Heavier pigment loads hide more but can settle quickly in the can and applicator. Stir thoroughly and often to keep pigment in suspension and ensure an even finish from start to end.
Prep Steps That Create an Even Finish
Surface preparation is where uniform color begins. Skipping these steps is the fastest route to blotchiness.
1) Clean thoroughly: Remove dirt, mildew, and gray fibers with a wood cleaner appropriate for your stain type. Rinse well. A clean, consistent surface improves penetration and color match.
2) Strip when necessary: If a previous coating remains, especially film-forming or solid stains that are peeling, strip or sand to a sound, even base. Layering new stain over glossy or patchy remnants exaggerates color differences.
3) Brighten to balance tone: A wood brightener (often oxalic acid–based) neutralizes cleaners, lightens darkened areas, and evens out tannin discoloration. Brightening is one of the most underrated color consistency tips.
4) Sand consistently: Remove mill glaze on new boards and smooth raised grain on weathered wood. Use a uniform grit (commonly 80–120 for decks and fences) across the entire project. Mixing grits creates varying porosity—and uneven color.
5) Address problem spots: Knots and end grain absorb more and will look darker. Pre-treat end grain with a light coat (or a specialized end-grain sealer if recommended by your stain maker) and wipe excess to prevent dark halos.
Choose and Batch Products for Uniformity
Product selection and mixing practices can make or break color uniformity.
Use the same product line: Stick with one brand and the exact product line for the entire job. Differences in resin, solvent, and pigment can shift color and sheen.
Buy enough at once: Purchase more than you think you need in a single trip to reduce lot-to-lot variation. Note batch numbers for future touch-ups.
Box your stain: Combine all gallons in a larger pail and mix thoroughly—this classic stain blending step neutralizes subtle can-to-can differences. Stir frequently during use to keep pigments evenly suspended.
Sample before you commit: Apply your intended stain to off-cuts or a discreet area of the fence or deck. Evaluate when dry under both sun and shade. Adjust with additional tint or a slight dilution (only if allowed by the manufacturer) to lock in your target tone.
Application Techniques for Consistent Color
Even the best prep needs disciplined application. Here’s how to execute for an even finish without lap marks.
Work in the shade and maintain a wet edge: Follow the sun so you’re always staining a cool surface. Plan sections that you can complete without stopping—one fence panel or several deck boards the full length—so edges stay wet and blend seamlessly.
Back-brush every pass: Whether you spray, roll, or pad the stain, finish by brushing with the grain. Back-brushing evens out film thickness, drives pigment into the wood, and removes excess that could flash or puddle.
Choose compatible tools: – Sprayer for speed, brush for control, pad for smoothness. Many pros spray then immediately back-brush. For rollers, use a 1/4–3/8″ nap for thin stains to avoid overloading.
Mind your coverage rate: Follow the can’s square-foot-per-gallon guidance. Over-application darkens and can look blotchy; under-application leaves light strips. Consistent loading of your brush, pad, or roller is a simple but powerful color consistency tip.
One coat or two? Many penetrating stains are single-coat. If two coats are allowed, “wet-on-wet” (second coat within the open time) can improve uniformity as the second coat redistributes pigment while the first is still receptive. Avoid adding a second coat after the first has cured unless the product is designed for it—this often creates shiny or darker patches.
Stir often: Pigments settle—especially in semi-transparent formulas. Stir every 10–15 minutes. If you pause for more than a few minutes, stir again before resuming to keep an even finish across the job.
Fence vs. Deck: Tactics for Each
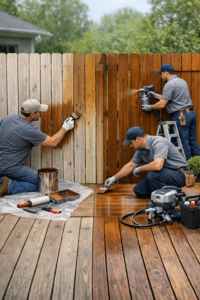
Fences: Control Lap Marks and Board Variation
Stain each board from top to bottom without stopping. Starting and stopping mid-board creates visible bands. Work one full panel at a time to keep edges wet. If spraying pickets, immediately back-brush to distribute stain evenly between flat faces and profiled edges. At posts and rails, lightly feather overlaps to avoid double coverage.
Pressure-treated fences can vary in moisture content by board. Start with the driest sections and monitor color as you go. If a board drinks stain and darkens, wipe excess within the open time to rebalance.
Decks: Think in Planks, Not Patches
On decks, stain 3–5 boards at a time from end to end to avoid start-stop lines. Do rails, balusters, and undersides first, then floorboards so drips don’t mark freshly finished surfaces. Pay special attention to end grain at steps and borders—pre-treat lightly and wipe down to prevent dark “picture framing.”
Between tight boards, use a brush to pull stain through the gap so edges match the field color. If you’ve replaced boards, consider a test blend or a slightly more opaque product to harmonize old and new.
Stain Blending: Harmonize Old and New Areas
Stain blending isn’t just mixing cans—it’s a strategy for transitions. When tying new sections into older ones, create a small test batch adjusted with tint or compatible clear to match the aged tone. Feather this blend across the transition boards, brushing with the grain for a soft merge. If your product line offers both semi-transparent and semi-solid options in the same color family, stepping up to a slightly more opaque version on mixed-age areas can deliver smoother, more uniform results.
Common Problems and Quick Fixes
Lap marks: While still wet, rework the edge with a brush to melt the boundary. If dry, lightly abrade the lap and apply a thin, even pass over the whole board, not just the mark.
Blotching or dark patches: Caused by over-application or absorbent knots/end grain. While within the open time, wipe with a clean rag lightly dampened with the stain’s solvent (for oil-based) or water (for water-based) to redistribute pigment. For cured discoloration, spot-brighten, rinse, dry, and apply a controlled touch-up.
Flashing or uneven sheen: Usually from inconsistent surface porosity or film thickness. Level with a light scuff and a unifying maintenance coat applied at the correct coverage rate with thorough back-brushing.
Tannin bleed or rust stains: Treat with a brightener or specialized cleaner, rinse, allow to dry, then touch up. Prevent recurrence with proper prep and compatible primers if using solid-color systems.
Color mismatch between cans: Stop, box remaining product, stir thoroughly, and use the blended mix to recoat the affected plane edge-to-edge for a seamless reset—one of the most reliable color consistency tips.
Timing and Weather Windows
Ideal conditions are mild temperatures, low to moderate humidity, and overcast or shaded surfaces. Avoid staining in direct sun, high wind, or when rain is expected before the stain’s specified dry time. Morning shade often offers the best working window; late-day sun can rush drying and cause lap marks. If conditions shift, reduce your working area to maintain control and an even finish.