Tips to Protect Your Fence and Deck Staining from Mold and Mildew
Your stained fence and deck deserve to look great season after season—but in damp, shady, or coastal climates, mold and mildew can quickly undermine that fresh finish. The good news: with smart product choices, consistent deck care, and a few environmental tweaks, you can dramatically reduce growth and keep wood healthier for longer. Below, you’ll learn why mold shows up on stained wood, how to prevent it, and the best practices for cleaning and maintenance without damaging your stain.
Why Mold and Mildew Form on Stained Wood
Mold and mildew are fungi that thrive where three conditions meet: moisture, minimal sunlight, and a food source. Even the best stains can’t prevent spores from landing, and pollen, dust, and wood sugars become a buffet if water lingers. Horizontal deck boards dry slowly after rain; fences near sprinklers or dense plantings trap humidity; and shaded corners rarely get enough sun to bake off dampness. Left unchecked, the result is discoloration, slick surfaces, and premature breakdown of your finish.
Prevention starts with the basics—controlling moisture and airflow—then choosing the right chemistry in your stain to resist biological growth. Think of it as a one-two punch: environmental management plus mold prevention stains designed to discourage organisms from taking hold.
Prevent Problems Before They Start: Design, Drainage, and Airflow
Small changes to your setup can make a big difference in mold pressure. Focus on keeping water moving and surfaces drying quickly:
- Improve drainage: Ensure deck boards are gapped correctly, pitched slightly for runoff, and free of debris that dams water. Add a gravel strip or drip edge at the base of fences to prevent splash-back.
- Tame sprinklers: Redirect heads so they don’t soak rails or pickets. Morning watering is better than evening; it gives wood time to dry.
- Boost airflow: Trim shrubs 12–24 inches from fence lines and under-deck areas. Use lattice panels that allow air circulation rather than solid skirting.
- Invite sunlight: Where feasible, thin overhead branches to increase sun exposure. Even an extra hour of light helps.
- Rethink accessories: Move planters off deck surfaces with risers, choose breathable outdoor rugs, and use vented grill mats to avoid trapped moisture.
- Mind the soil line: Keep mulch and soil a few inches below the bottom rail or first fence board so wood doesn’t wick moisture.
Choose the Right Stain System for Mold Resistance
Not all stains fight fungi equally. Look for mold prevention stains that incorporate mildewcides and UV inhibitors. Penetrating, breathable finishes typically outperform heavy films in damp environments because they allow moisture to escape rather than blistering or peeling.
- Ingredients to look for: Zinc or other EPA-registered mildewcides, high-quality resins, and UV blockers to limit sun damage that roughens wood and harbors growth.
- Sheen and opacity: Semi-transparent stains balance protection and breathability; solids hide grain but can trap moisture if applied too thick.
- Wood species: Cedar and redwood contain natural extractives but still benefit from mildewcides; pressure-treated pine is more prone to surface growth and needs diligent protection.
Oil-Based vs. Water-Based in Humid Climates
Modern water-based acrylic stains dry fast, stay color-stable, and can be highly mildew-resistant when fortified with mildewcides. Oil-based formulas penetrate deeply and are easy to refresh but may feed mildew if they contain traditional linseed oils without proper additives. If you prefer oils, choose modified, low-nutrient oils specifically labeled for mildew resistance.
Color Choices Matter
Darker colors absorb more heat and may dry slightly faster after rain, while very light finishes can show staining more readily. Prioritize a product’s mildewcide package and breathability first; then select a tone that suits your aesthetic and maintenance goals.
Cleaning and Gentle Maintenance That Protect the Stain
Routine cleaning removes spores and food sources before they colonize. Build a simple schedule and stick to it:
- Monthly in wet seasons: Sweep or blow off leaves, pollen, and dirt; rinse with a garden hose. This easy deck care habit pays huge dividends.
- After storms: Clear debris from board gaps and fence rails so water can drain and air can move.
- Use the right cleaner: Oxygenated bleach (sodium percarbonate) safely targets organic stains without harsh chlorine damage. pH-neutral soaps work for general grime.
- Pressure washing caution: Too much pressure can raise the grain and strip stain. Stay under ~800–1,000 PSI, use a wide fan tip, and keep the wand moving.
- Protect landscaping: Pre-wet plants, rinse thoroughly, and cover delicate foliage when using any cleaner.
A Seasonal Deck Care Checklist
- Spring: Wash, spot-treat algae and mildew, inspect for loose boards or popped fasteners.
- Summer: Quick rinse during hot, humid stretches; lift planters and rugs weekly.
- Fall: Clear leaves promptly; clean gutters to reduce splash-back and overflows.
- Winter: Sweep snow with a plastic shovel; avoid rock salt on wood surfaces.
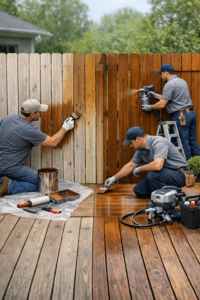
Step-by-Step Mildew Removal: Fence and Deck
When growth appears, act quickly. The faster you remove it, the less it etches into the finish.
- Identify the culprit: Mildew is typically gray, white, or black with a powdery look; algae is greener and slimy. Both respond to oxygenated cleaners.
- Pre-wet surfaces: Lightly mist wood and surrounding plants to reduce cleaner absorption and protect foliage.
- Mix cleaner: Follow label directions for an oxygen bleach solution. Avoid straight chlorine bleach; it can damage wood fibers and nearby plants.
- Apply generously: Use a pump sprayer or soft brush. Let dwell 10–15 minutes, keeping the area wet.
- Agitate gently: Scrub with a soft-bristle brush along the grain—especially on railings, horizontal caps, and high-traffic deck zones.
- Rinse thoroughly: Flush until runoff is clear. Repeat on stubborn areas.
- Brighten if needed: An oxalic acid brightener can neutralize cleaner residue and restore color before recoating.
- Dry fully: Allow 24–48 hours of dry weather. Wood moisture should be under ~15% before applying stain.
- Recoat smartly: Touch up worn sections or recoat the full panel/board run for uniform appearance with a mildew-resistant product.
If you’ve been searching for “mildew removal fence” tips, the process above applies equally to vertical pickets and posts—just reduce pressure and rely more on dwell time and gentle brushing.
Spot Treatment vs. Full Recoat
Light, isolated growth often resolves with a clean-and-rinse. If you notice widespread fading, water no longer beads, or color looks blotchy after cleaning, plan a full maintenance coat for consistent protection.
Application Best Practices and a Reliable Maintenance Schedule
Proper application makes your stain last longer and resist growth better:
- Weather window: Apply between 50–90°F with no rain in the forecast for 24–48 hours. Shade is your friend during application.
- Surface prep: Clean, brighten, and let wood dry thoroughly. Sand rough fibers lightly and remove dust.
- Technique: Work 2–3 boards at a time, back-brushing for even penetration. Avoid over-application—thin, even coats outperform heavy layers.
- Wet-on-wet second coat: If recommended by the manufacturer, apply a second coat while the first is still absorbing.
Maintenance cadence: Plan on recoating horizontal deck surfaces every 18–36 months and vertical fences every 3–5 years, depending on climate, sun exposure, and traffic. Perform the “sprinkle test”: if water immediately darkens and soaks in, it’s time to recoat.
Eco and Safety Considerations
- Cleaner choice: Oxygen-based cleaners are generally plant-friendlier than chlorine bleach. Always follow label instructions.
- Protect runoff: Divert rinse water away from ponds and storm drains when possible.
- PPE: Wear gloves, eye protection, and a mask when mixing powders or brighteners.
- Rag disposal: Oil-soaked rags can self-heat; dry them