
Preparing Your Wood Surface for Staining
A beautiful stain job starts long before the stain is opened. If you want rich color, even coverage, and long-lasting protection, the real work begins with wood surface prep. Proper preparation helps stain soak in evenly, improves adhesion, and reduces common problems like blotching, peeling, or premature wear.
Whether you are working on furniture, fencing, siding, or handling full deck preparation, taking time to prep the surface correctly can make a major difference in the final result. From sanding rough areas to thorough cleaning and moisture checks, each step plays a role in achieving a smooth, professional finish.
In this guide, we will walk through the essential steps for preparing your wood surface for staining so you can get the best possible outcome from your project.
Why Wood Surface Prep Matters Before Staining
Stain is not like paint. Instead of sitting heavily on top of the wood, it penetrates the surface to enhance the natural grain and add protection. Because of that, any dirt, old finish, rough fibers, or trapped moisture can interfere with how the stain absorbs.
Good wood surface prep delivers several important benefits:
Better absorption: A properly prepared surface allows the stain to penetrate more evenly.
Improved appearance: Prepping reduces streaks, lap marks, and patchy color.
Longer-lasting finish: Stain performs better when it bonds with clean, dry wood.
Smoother texture: Sanding and surface correction help produce a more refined final look.
Skipping preparation may save time upfront, but it often leads to disappointing results and more work later.
Assess the Condition of the Wood
Before you begin cleaning or sanding, inspect the wood carefully. Preparation methods can vary depending on whether the wood is new, weathered, previously stained, or damaged.
Check for Existing Finish
If the wood has an old stain, sealer, paint, or clear coat, the new stain may not absorb correctly until the previous coating is removed or properly addressed. Sprinkle a little water on the surface. If the water beads up rather than soaking in, there is likely an existing finish present.
Look for Damage
Examine the wood for cracks, splinters, mildew, gray weathering, nail pops, or rot. Stain can enhance the beauty of wood, but it will not hide structural issues. Replace damaged boards and repair minor imperfections before moving forward.
Determine Moisture Levels
Wood should be dry before staining. If the surface is damp from rain, washing, or humidity, wait until it dries fully. For outdoor projects and deck preparation, a moisture meter can be especially helpful. In most cases, wood should be at or below the stain manufacturer’s recommended moisture content.
Step 1: Clean the Surface Thoroughly
One of the most important stages of wood surface prep is cleaning. Dust, pollen, grease, mildew, and general grime can all prevent the stain from penetrating evenly.
Basic Cleaning for Interior Wood
For furniture, trim, and indoor wood surfaces, begin by removing loose dust and debris with a vacuum or soft brush. Then wipe the surface with a damp cloth or a wood-safe cleaner if needed. Avoid soaking the wood, and allow it to dry completely before staining.
Cleaning Outdoor Wood and Decks
For exterior wood, especially during deck preparation, deeper cleaning is usually required. Outdoor surfaces often collect dirt, algae, mildew, and old residue that can affect stain performance.
Use a dedicated wood cleaner or deck wash designed for exterior surfaces. Follow the product instructions carefully, scrub where necessary, and rinse thoroughly. A pressure washer can be used in some cases, but it must be handled carefully. Too much pressure can damage wood fibers, leave visible marks, and make the surface uneven.
After washing, allow the wood to dry fully before moving to the next step. Depending on weather conditions, this may take a day or more.
Step 2: Remove Old Stain or Failing Finish if Necessary
If the existing finish is peeling, flaking, glossy, or uneven, it may need to be removed before new stain is applied. This is especially true when switching from one stain type to another or when the old finish prevents absorption.
You may need to use:
Chemical strippers: Useful for breaking down old coatings on some surfaces.
Wood brighteners: Helpful after stripping or deep cleaning to restore a more natural wood tone.
Sanding: Effective for removing light coatings and smoothing the surface after stripping.
Always test your method in a small area first. The goal is to create a uniform surface that will accept stain consistently.
Step 3: Sand the Wood Properly
Sanding is one of the most critical parts of preparing wood for stain. It smooths rough spots, removes minor imperfections, and opens the grain enough for better stain absorption. However, technique matters. Poor sanding can leave swirl marks, uneven texture, or wood that is too smooth to absorb stain well.
Choose the Right Grit
For most staining projects, start with a medium grit if the surface is rough or weathered, then move to a finer grit for a smoother finish. Common grit progressions include:
60 to 80 grit: For rough, heavily weathered, or previously coated wood.
100 to 120 grit: Ideal for general prep before staining in many cases.
150 grit: Useful for final smoothing on some interior projects, though going too fine can reduce stain penetration.
For many softwoods, stopping at 120 grit is a good balance. Hardwoods may vary depending on the desired finish and stain type.
Sand With the Grain
Always sand in the direction of the wood grain when possible. This helps minimize visible scratches and creates a more natural final appearance.
Be Consistent Across the Entire Surface
Uneven sanding can lead to uneven stain color. If one section is sanded more aggressively than another, it may absorb stain differently. Try to keep pressure and grit progression consistent across the project.
Do Not Forget the Dust Removal Step
Once sanding is complete, remove all dust thoroughly. Vacuum the surface, then wipe it down with a microfiber cloth or tack cloth if appropriate. Leftover dust can mix with the stain and create a muddy or rough finish.
Step 4: Address Raised Grain and Surface Irregularities
After cleaning or washing, some wood surfaces may develop raised grain. This is common with outdoor lumber and water-based cleaning methods. A light follow-up sanding can smooth these fibers and improve the feel of the finished wood.
This is also the time to fill minor holes or imperfections if your project requires it. Be aware that some wood fillers do not accept stain the same way natural wood does, so choose a stainable filler and test it first.
Step 5: Ensure the Wood Is Completely Dry
No matter how carefully you handle wood surface prep, staining damp wood can ruin the results. Excess moisture blocks stain penetration and may cause uneven color, poor adhesion, or mildew issues later.
For interior projects, allow enough drying time after cleaning. For outdoor surfaces and deck preparation, drying time may be longer depending on humidity, shade, and temperature. As a general rule, wait until the wood feels dry and conditions are favorable according to the stain manufacturer.
If possible, stain during mild weather and avoid days with rain in the forecast.
Special Considerations for Deck Preparation
Deck preparation deserves extra attention because decks face direct sun, rain, foot traffic, and seasonal changes. A deck that is not prepped correctly may show stain failure much sooner than expected.
Inspect Boards and Fasteners
Check for loose boards, protruding nails, popped screws, and signs of rot. Secure or replace anything that could compromise the surface.
Wash Away Contaminants
Decks often collect sunscreen residue, leaves, mildew, and embedded dirt. Thorough cleaning is essential before staining.
Allow Enough Drying Time
One of the biggest mistakes in deck preparation is staining too soon after washing. Even if the surface looks dry, moisture may still be trapped inside the boards.
Sand High-Traffic Areas
Deck surfaces often become rough over time. Light sanding can smooth splinters and worn spots, making the stain look better and the deck safer underfoot.
Common Mistakes to Avoid
Even experienced DIYers can run into trouble if they rush through wood surface prep. Here are some of the most common mistakes to avoid:
Skipping cleaning: Staining over dirt or mildew leads to poor absorption and reduced durability.
Using too much pressure when washing: This can scar the wood and create fuzzy fibers.
Over-sanding: A surface that is too smooth may not absorb stain evenly.
Failing to remove sanding dust: Dust interferes with the finish and can create texture problems.
Staining wet wood: Moisture prevents proper penetration and may cause early failure.
Ignoring product instructions: Different stains may have different prep requirements.
Tools and Materials That Help
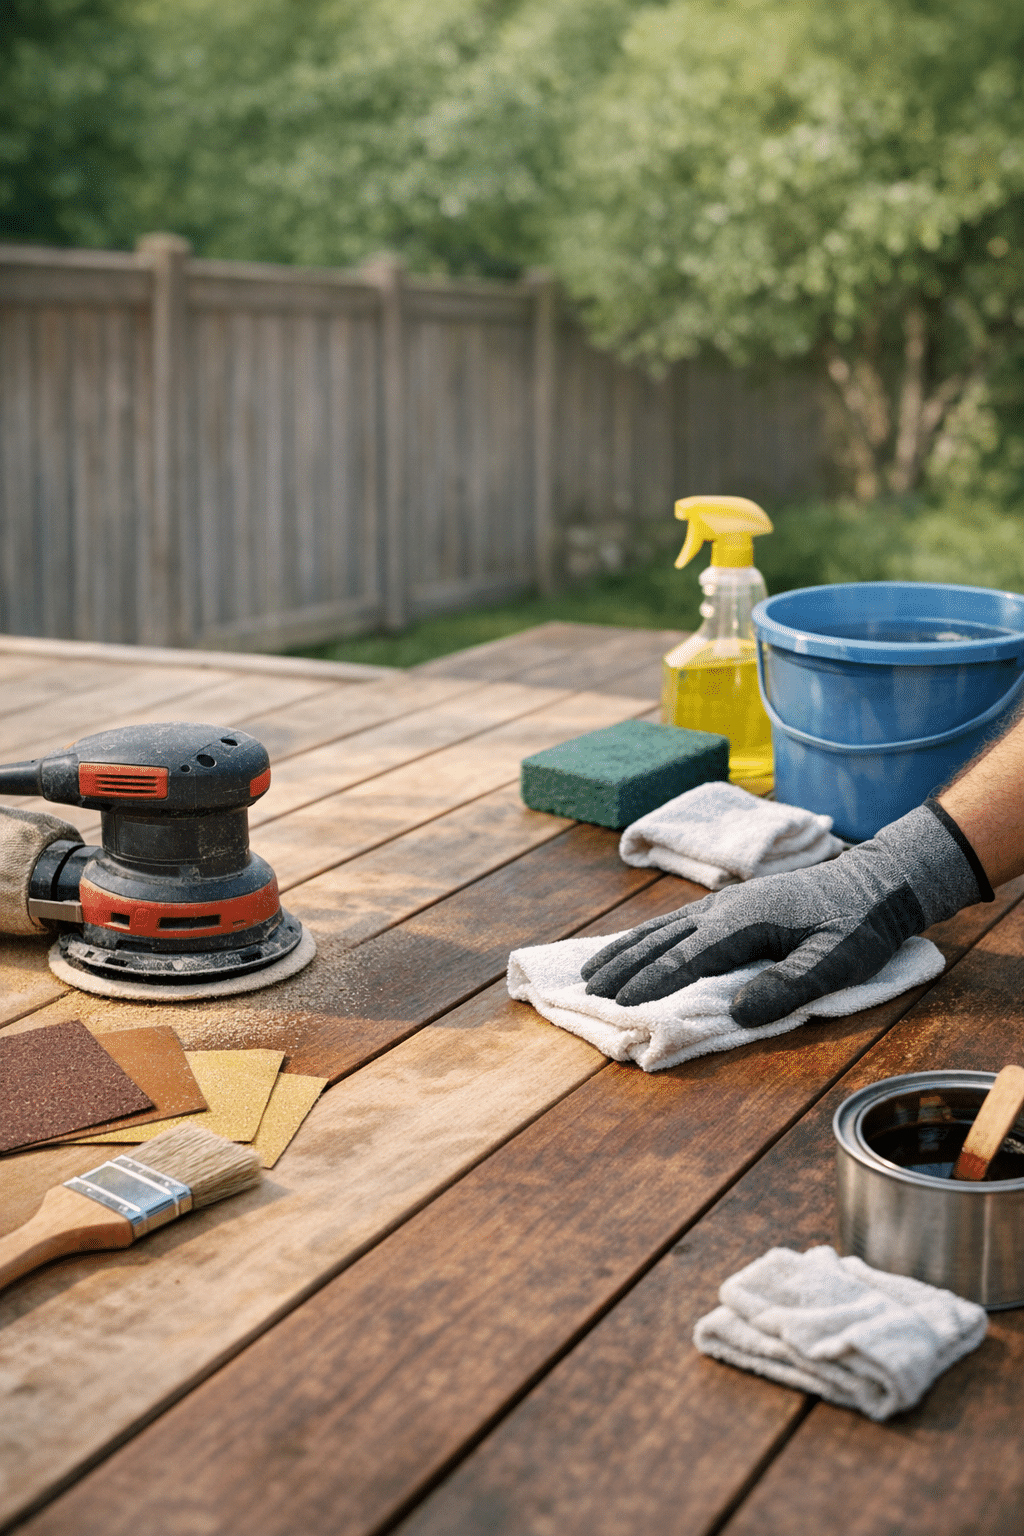
Having the right tools can make wood surface prep faster and more effective. Depending on your project, useful supplies may include:
Work gloves and safety glasses
Broom, brush, or vacuum
Wood cleaner or deck wash
Scrub brush
Orbital sander or sanding block
Assorted sandpaper grits
Tack cloth or microfiber cloth
Moisture meter
Wood filler for minor repairs
Quality preparation tools often save time and improve the final finish.
How to Know When the Surface Is Ready
Before applying stain, do a final check. The wood should be:
Clean: No visible dirt, mildew, grease, or dust
Smooth: Properly sanded without splinters or heavy roughness
Uniform: No patchy finish residue or inconsistent prep marks
Dry: Free from lingering moisture after washing or weather exposure
If the surface meets these conditions, your prep work has set the stage for a better stain application and a more professional result.
Final Thoughts on Preparing Wood for Stain
The secret to a great stain finish is rarely in the stain alone. It comes from careful wood surface prep, including proper cleaning, thoughtful sanding, and complete drying before application. Whether you are refreshing furniture indoors or handling large-scale deck preparation outdoors, these steps help ensure stronger adhesion, better color consistency, and longer-lasting protection.
Take the time to prep the right way, and your stained wood will look better from day one and hold up longer over time. If you are getting ready for your next staining project, start with the surface—and give your finish the foundation it deserves.