Tips for Hiring a Fence and Deck Staining Contractor
A fresh, professional stain can transform a weathered fence or deck, protect it from the elements, and add lasting curb appeal. But the results depend on the person you hire. If you want a durable, even finish that holds up to sun, rain, and foot traffic, you need a reputable specialist. This guide walks you through smart contractor vetting, how to read service reviews with confidence, and practical hiring tips so you can choose the right fence and deck staining contractor the first time.
Why Hiring a Pro Matters for Fences and Decks
Staining wood outdoors sounds simple, but making it last is not. A seasoned contractor understands prep methods for different wood species, how to neutralize cleaners and strippers, the right moisture content before application, and how weather, sun exposure, and product choice affect longevity. The right pro will:
- Prevent common failures like peeling, blotching, lap marks, and premature fading.
- Select stains and sealers that fit your climate, wood type, and maintenance goals.
- Work safely around landscaping, hardscapes, pools, and nearby surfaces.
- Save you time and money by avoiding rework and costly product mistakes.
Start with a Clear Scope and Expectations
Define Your Project
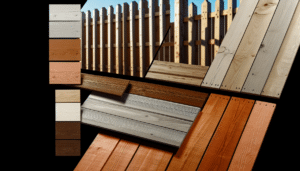
Before you call anyone, outline exactly what you need. Note wood species (cedar, redwood, pressure-treated pine, composite railings), whether the surface is new or previously coated, square footage, difficult-to-reach areas, and any repairs required. Decide on product type (transparent, semi-transparent, or solid stain) and preferred color family. Clarify whether you need cleaning, stripping, sanding, or brightening, and whether both sides of a fence will be stained.
Set a Budget and Timeline
Seasonality matters. Spring and fall often offer the best weather windows. Build in time for cleaning, drying, and any rain delays. Request a realistic start date, estimated duration, and understand curing times before heavy use, especially for decks.
Contractor Vetting Essentials
Thorough contractor vetting protects your home and wallet. Use these steps to build a trustworthy shortlist.
Verify Credentials, Insurance, and Licensing
Ask for proof of general liability and workers’ compensation insurance. Confirm any required local licensing or registration. If coatings near older painted surfaces may be disturbed, ensure lead-safe practices compliance (EPA RRP certification). Bonding is a plus for larger projects.
Review Portfolios and References
Request a portfolio with fence and deck staining specifically—ideally on similar wood species and exposure conditions. Look for close-up photos that show consistent coverage on vertical pickets, railings, and horizontal boards. Call 2–3 recent references and ask about punctuality, site protection, communication, change orders, and, most importantly, how the finish looks 12 months later.
Check Service Reviews the Smart Way
Don’t just glance at star ratings. Cross-check service reviews on multiple platforms (Google, Yelp, BBB, Angi, Nextdoor, Facebook). Look for patterns in comments—prep quality, cleanup, responsiveness to issues, and durability over time—not just first impressions. Weigh recent reviews more heavily and notice how the contractor responds to complaints. Search review text for “deck,” “fence,” “stain,” and the products used to ensure the contractor truly specializes in wood care.
Get and Compare Detailed Written Estimates
What a Strong Estimate Includes
Transparent bids reduce surprises. Ask each contractor to provide a written estimate that covers:
- Scope: areas included (deck boards, rails, stringers, posts, fence boards, gates, both sides of fencing).
- Prep: cleaning method and chemicals, stripping plan if needed, brightening/neutralizing, sanding locations and grits, nail/screw setting and repairs.
- Products: brand, line, color, base (oil vs water-based), number of coats, solids content, and manufacturer warranty.
- Application: brush/roll/spray approach and back-brushing/back-rolling to ensure penetration and evenness.
- Weather strategy: required surface moisture, temperature and humidity ranges, rain delay procedures, and rescheduling policy.
- Protection: masking, landscape and hardscape protection, overspray control, and cleanup plan.
- Timeline: start date, duration, crew size, work hours.
- Warranty: what’s covered (e.g., premature peeling) and what’s excluded (e.g., sprinkler damage, standing water, pet scratches).
- Cost breakdown: labor, materials, extras (repairs, board replacements), taxes, and payment schedule.
Compare Apples to Apples
If one bid is significantly lower, find out why. Are they skipping stripping that another contractor recommends? Using a cheaper product or fewer coats? “Cheapest” often means less prep or shorter-lived results. Use these hiring tips to align bids: specify the same product line and color, prep steps, and coat count across all quotes so you can make a fair comparison.
Key Questions to Ask During Consultations
Strong hiring tips start with strong questions. Ask:
- How will you test wood moisture, and what threshold do you require before staining?
- What cleaning or stripping chemicals do you use, and how will you neutralize and balance pH before staining?
- What PSI and tips do you use for pressure washing to avoid furring or gouging the wood?
- Will you sand high-traffic deck areas, handrails, and drip edges? What grits?
- Do you back-brush or back-roll after spraying to prevent lap marks and ensure penetration?
- How do you handle end-grain sealing, knot bleed, and tannin migration?
- What’s your rain buffer before and after application, and how do you monitor forecasts on site?
- Can you do sample boards or a small test section for color approval?
- How do you protect landscaping, siding, windows, pavers, and nearby vehicles from overspray?
- What’s the plan for gates, latches, and hardware to avoid sticking or staining?
- For fences: will you stain both sides and the bottom edges? Will you coordinate with neighbors if needed?
Products and Process Matter
Choosing the Right Stain and Sealer
Each finish has trade-offs:
- Transparent and semi-transparent stains highlight grain and penetrate deeply; they’re easier to maintain but typically need more frequent refreshes.
- Solid stains provide the most UV protection and uniform color; they form more of a film and may require more surface prep at recoat time.
- Oil-based vs water-based: Oils generally penetrate well and are forgiving; water-based options dry faster, have lower odor, and can be more color-stable. Your climate, sun exposure, and usage will influence the best choice.
A knowledgeable pro will match the product to your goals (natural look vs opaque color, maintenance frequency, slip resistance on stairs, mildew resistance in humid areas) and explain recoat cycles.
Prep Is 80% of the Job
Long-lasting results come from meticulous prep: removing dirt, mildew, and failed coatings; stripping where needed; brightening and neutralizing to restore wood pH; and allowing adequate dry time. Most exterior wood should be below roughly 15% moisture content before staining. Skipping or rushing these steps leads to early failure.
Application Best Practices
Ideal conditions are typically 50–90°F with moderate humidity and shade during application. Pros maintain a wet edge, apply thin, even coats, and back-brush to avoid lap marks. They also seal end grain, address undersides where practical, and stage the work to minimize footprints and tracking.
Red Flags to Avoid
- No proof of insurance or licensing.
- Vague, one-line estimates without prep or product details.
- Pressure tactics, door-to-door pitches, or requests for large cash deposits.
- Inability to name the exact stain brand/line or provide a data