How to Enhance Wood Grain When Staining Fences and Decks
The right combination of prep, product, and technique can make your fence or deck glow with character. If you love the look of distinctive cathedrals, swirls, and knots, a focused approach to stain choice and application will amplify that natural figure rather than hide it. This guide walks you through practical, pro-level methods for wood grain enhancement on exterior surfaces, with specific stain recommendations, application strategies, and deck staining tips that help your project look rich and refined for seasons to come.
What Makes Wood Grain Pop?
Wood grain visibility is all about contrast and clarity. Earlywood (the softer, lighter bands) absorbs more finish, while latewood (denser, darker bands) takes less. When you clean and prepare the surface to emphasize this difference, then choose a stain that adds color without clouding the view, the figure stands out beautifully.
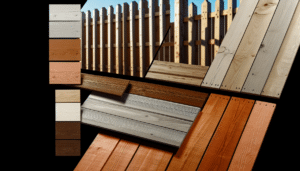
Species and cut matter, too. Cedar and redwood often show striking grain and color shifts that respond well to subtle tints. Pine can blotch; careful prep and product selection help. Pressure-treated lumber benefits from proper drying and surface conditioning to reduce mill glaze and accept stain evenly. Whatever you’re working with, plan for a system that keeps the wood’s natural detail front and center.
Choose the Right Stain for Wood Grain Enhancement
Transparent and Translucent Stains
For maximum wood grain enhancement, start with transparent or translucent stains. Transparent options offer the most clarity but provide the least UV protection. Translucent stains add a touch more pigment, gently warming tone and boosting contrast while still letting the pattern show through. On fences, these are often ideal. On decks, translucent or light semi-transparent tones strike a smart balance between visibility and durability.
Semi-Transparent vs. Semi-Solid vs. Solid
Semi-transparent stains contain more pigment for UV defense but still show grain clearly. Semi-solid options mute grain visibility yet deliver strong sun-blocking power—useful for high-exposure decks or weathered boards. Solid-color stains hide grain like paint; they’re great for uniform color but not for grain-forward projects. If enhanced grain is your goal, prioritize translucent and semi-transparent products where practical.
Oil-Based vs. Waterborne Penetrating Formulas
Penetrating stains (both oil-based and modern waterborne oils) soak into the wood instead of forming a thick film. That penetration helps maintain clarity and reduces peeling risk. Oil-based translucent stains often enrich depth and warmth. Waterborne penetrating formulas dry faster, resist mildew, and can be easier to clean up. Either way, avoid heavy film-forming finishes if wood grain enhancement is your priority.
Pigments, Dyes, and Toners
Lightly pigmented toners and dyes bring subtle color without obscuring detail. Pigments tend to lodge in softer earlywood, increasing contrast, while dyes color more uniformly. Many premium translucent stains use finely milled pigments for clarity. Look for labels that mention “toner,” “clear with UV blockers,” or “translucent” for the most grain-forward results.
Surface Preparation for Maximum Contrast
Clean, Strip, and Brighten
Great stain can’t rescue a dirty or oxidized surface. Clean first using an oxygenated cleaner to remove grime and graying. If the wood has an old finish, strip as needed following the manufacturer’s directions. Then apply a wood brightener (often oxalic or citric acid based). Brighteners restore pH, open the pores, and even out color—key steps for crisp, high-contrast grain. Rinse thoroughly and let the wood dry.
Sand Strategically
Over-sanding can “burnish” the surface, closing pores and reducing absorption (and contrast). For decks, finish around 60–80 grit; for fences, 80–120 grit is common. The goal is a clean, uniformly abraded surface with just enough tooth to accept stain well. Spot-sand problem areas and feather edges where old coatings linger so the final result looks consistent.
Raise the Grain Intentionally
If your wood looks too glassy after sanding, lightly mist it with water to raise the grain, let it dry, then knock down only the fuzz with a quick pass of the same grit. This technique increases micro-texture in softer bands, encouraging slightly deeper stain absorption and a more dramatic grain pattern when you apply translucent stains.
Check Moisture and Plan the Weather Window
Wood should be dry (generally below 15% moisture) before staining. A quick water-drop test can help: droplets should absorb rather than bead on the surface. Apply stain in mild temperatures, low to moderate humidity, and shade when possible. Direct sun and wind accelerate drying and can cause lap marks that distract from clean, even grain presentation.
Application Techniques That Highlight Figure
Flood-and-Brush (Wet-on-Wet) Application
For fences and rails, apply stain liberally enough to wet the surface, then back-brush to drive finish into pores and remove excess, working along the natural lines of the wood. Maintaining a “wet edge” prevents stripes. On thirsty areas, a second light pass (while the surface is still receptive) can deepen tone without creating a surface film.
Direction Matters
Always brush and feather in the direction of the grain. On vertical fence boards, work from top to bottom in continuous strokes. On deck boards, run with the board length, not across. This simple habit keeps visual rhythm intact so the grain reads as one cohesive pattern.
Sprayer Plus Back-Brushing
If you spray, follow immediately with a brush to even out coverage and push stain into pores. This combination speeds production on large fences yet preserves the handcrafted look that shows grain best. Keep coats thin; puddles and drips can cure blotchy and mask detail.
Two-Tone Strategies
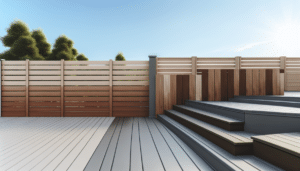
Balance beauty and longevity by mixing opacities. Use translucent stains or light semi-transparents on vertical elements (posts, balusters, fascia) for maximum wood grain enhancement, and step up to a slightly more opaque semi-transparent on horizontal deck boards that take the brunt of UV and foot traffic. You’ll protect where it matters while keeping the eye-level details rich and textured.
Color Selection That Complements Natural Grain
Choose undertones that harmonize with the species. Honey ambers, warm cedars, and light walnuts often accentuate grain without overpowering it. Cool grays can modernize while still revealing texture—just pick a translucent version with subtle pigment. Always test in an inconspicuous spot and view samples in sun and shade; exterior light shifts dramatically throughout the day and can change how prominently grain appears.
Deck Staining Tips for Long-Lasting Grain Definition
Thin, even coats win. Penetrating stains look their best when they soak in rather than sit on top. Wipe off or brush out excess before it tacks. This preserves clear optics and prevents shiny patches that distract from the wood’s figure.
Work one or two boards at a time. On decks, run full-length passes and finish boards end-to-end before moving on. This avoids lap lines that can slice through grain patterns.
Seal end grain. Ends drink finish faster and can darken more. Touch them first with a light pre-coat, then blend as you do the field to keep color consistent and grain readable.
Mind UV and mildew resistance. Look for products with UV inhibitors and mildewcides. Sun fade and biologic growth both dull grain contrast over time; prevention keeps detail crisper, longer.
Refresh before it fails. A simple wash and single maintenance coat every 1–3 years (climate dependent) keeps the look vibrant. Waiting until the finish fully weathers often means deeper cleaning or stripping that can soften the wood’s surface and reduce contrast.
Common Mistakes to Avoid
Over-sanding to 150–220 grit on exterior projects can glaze pores and reduce absorption, blurring grain. Heavy, film-forming coats mute wood figure and can peel. Staining in hot sun or high wind leads to lap marks. Skipping brightener after cleaning or stripping can leave the surface dull and blotchy. Staining wet or new pressure-treated wood too soon invites uneven absorption. And always handle oily rags safely—lay flat to dry outdoors or store in a sealed metal container to prevent spontaneous combustion.
Maintenance Without Losing the Look
To preserve that crisp, grain-forward appearance, clean gently with